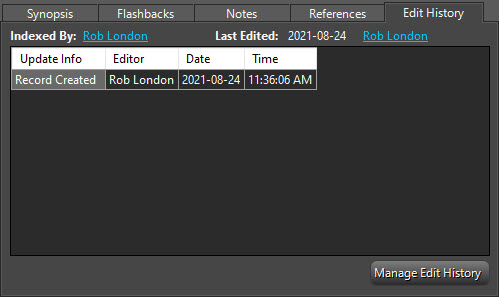
When a new record is added, an Edit History item is automatically generated for the creation of the record.
After initial Creation, whenever a record is Edited, and the Save button is clicked, a prompt will appear reminding you to update the Edit History with changes you made.
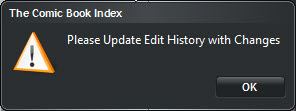
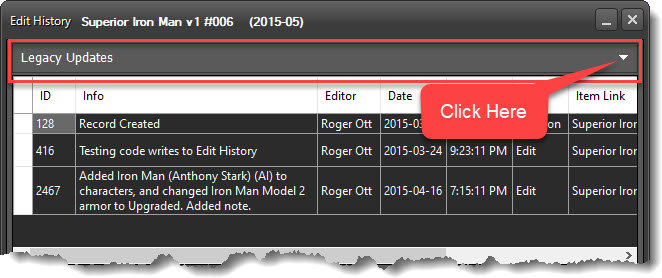
The program will then switch to the Edit History tab.
Click  to open the Edit
History form:
to open the Edit
History form:
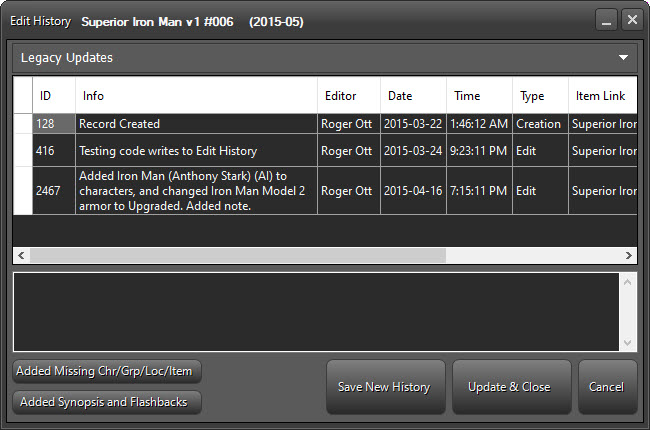
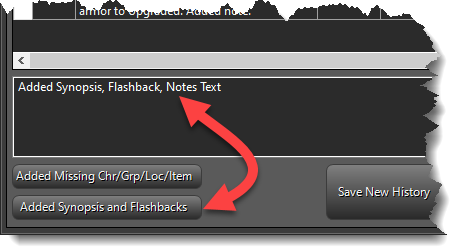
Type any freeform update information into the text box, or alternately, there are two buttons that will add common predefined notes to the update information:

Right-Click in the text box for a menu option to clear all text from the box
![]()
After you have entered the update information you want, click Save New History to add the new History item to the application. Click Update & Close to close the History window and refresh the Edit History list on the previous form.
LEGACY UPDATES
A new Edit History system replaced the original version in 2015, therefore many older updates are not yet recorded in the new system. If updating a record that has no Creation history, there is an Legacy Update option.
The dropdown has a list of legacy edit dates and associated fields. Instructions on how to work with legacy updates are included in the dropdown.
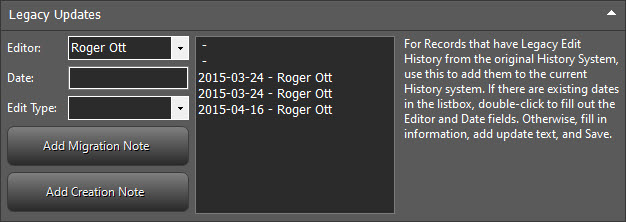
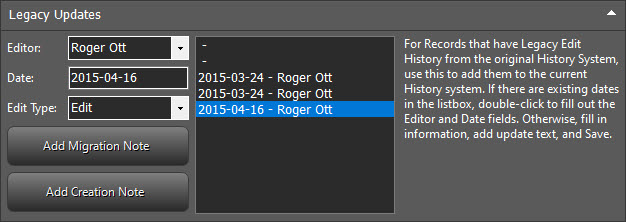
Double-clicking an item in the date list will add the Editor name and the Date of the old Edit to the proper fields.
If there is nothing in the listbox, then consult with other editors/administrators and decide on an effective entry date. A vast majority of Legacy dates were between 2011-2012 when the program was being built and tested.
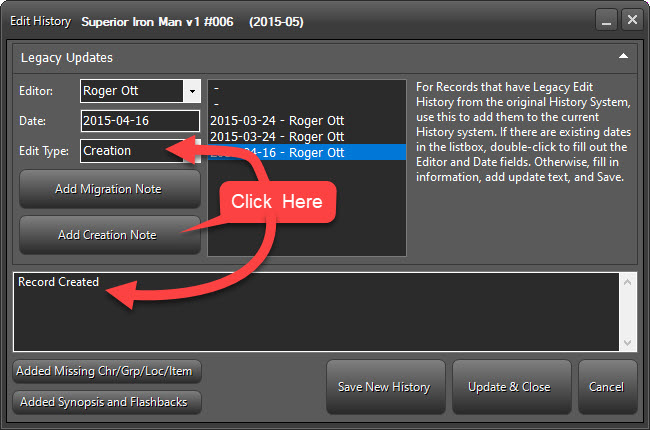
Click  to autocreate a Creation record
note. The Edit Type will fill in, and text will be generated in the update box.
to autocreate a Creation record
note. The Edit Type will fill in, and text will be generated in the update box.
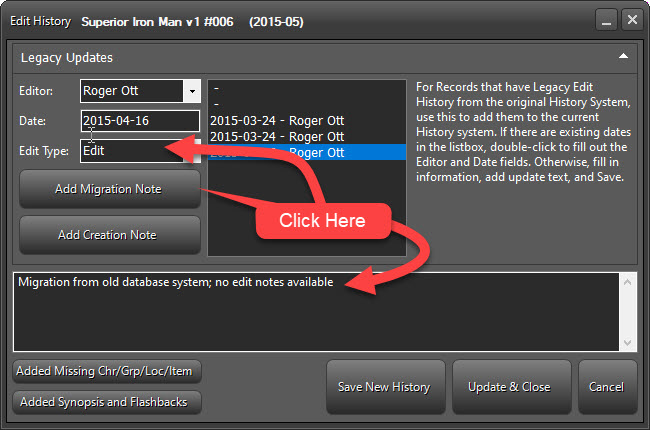
Click  to autocreate a Migration record
note. The Edit Type will fill in, and text will be generated in the update box.
to autocreate a Migration record
note. The Edit Type will fill in, and text will be generated in the update box.
Click Save New History for each legacy edit record, then Update & Close to close the form and refresh the Edit History list on the previous form.
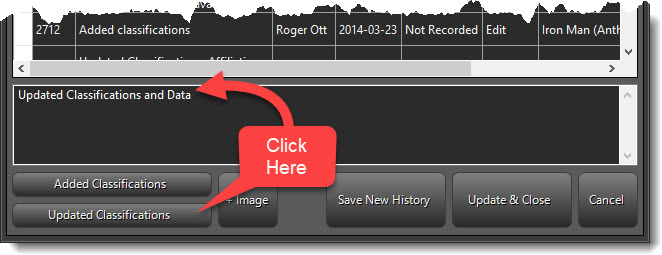
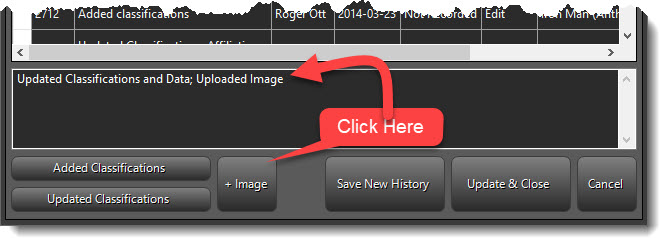
Characters, Groups, Locations, and Items Edit History works similarly, with differences to the predefined notes buttons as shown below.
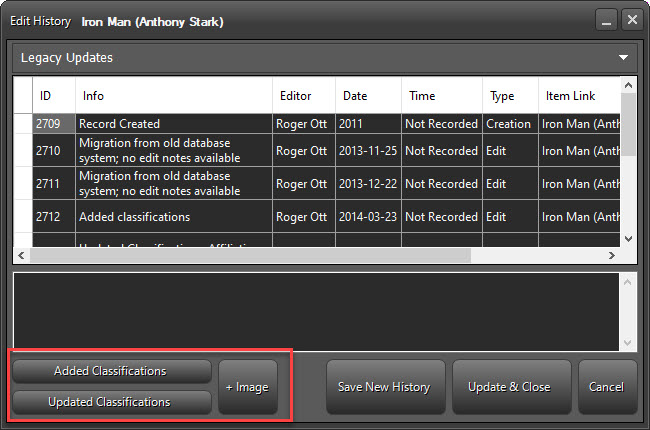
When editing Characters, Groups, Locations, and Items, the most common edits are adding or updating Classifications and Data and image uploads. These buttons will autocreate the update text.
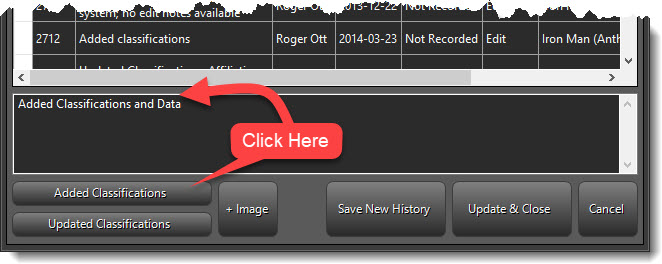
Clicking on  will add an Add Classifications note to the update
box.
will add an Add Classifications note to the update
box.
Clicking on  will add an Update Classifications note to the update
box.
will add an Update Classifications note to the update
box.
Clicking on  will add an Image note or Append an image note to the
textbox if there is already existing text there.
will add an Image note or Append an image note to the
textbox if there is already existing text there.
After entering the appropriate update information, click Save New History. When finished, click Update & Close to close the form and update the original window.